

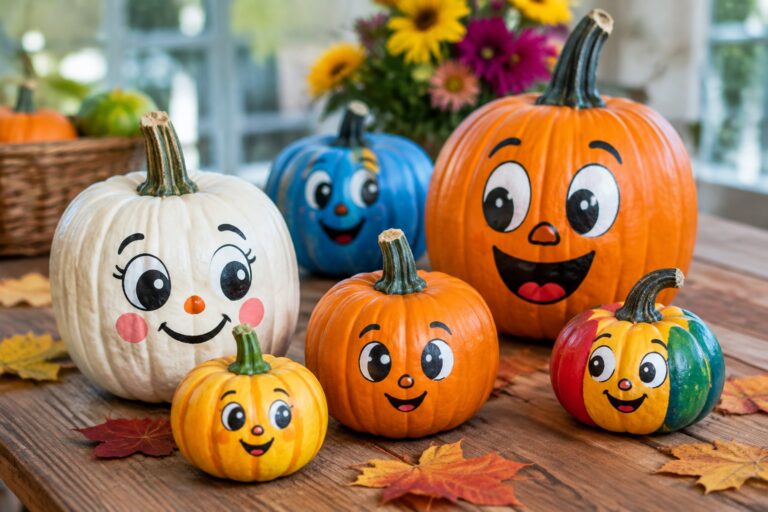
I have always found that getting kids involved in pumpkin decorating brings a certain energy to the house during October.
Pumpkins offer an easy starting point because they work on the kitchen table or the front steps without needing a lot of space.
When my children help choose the designs, the results feel more personal than anything I could buy.
It is nice to keep the projects simple so the focus stays on the activity itself rather than perfect outcomes.
The best part is watching them light up when they see their finished pumpkins on display.
Give Pumpkins Friendly Faces With Simple Supplies
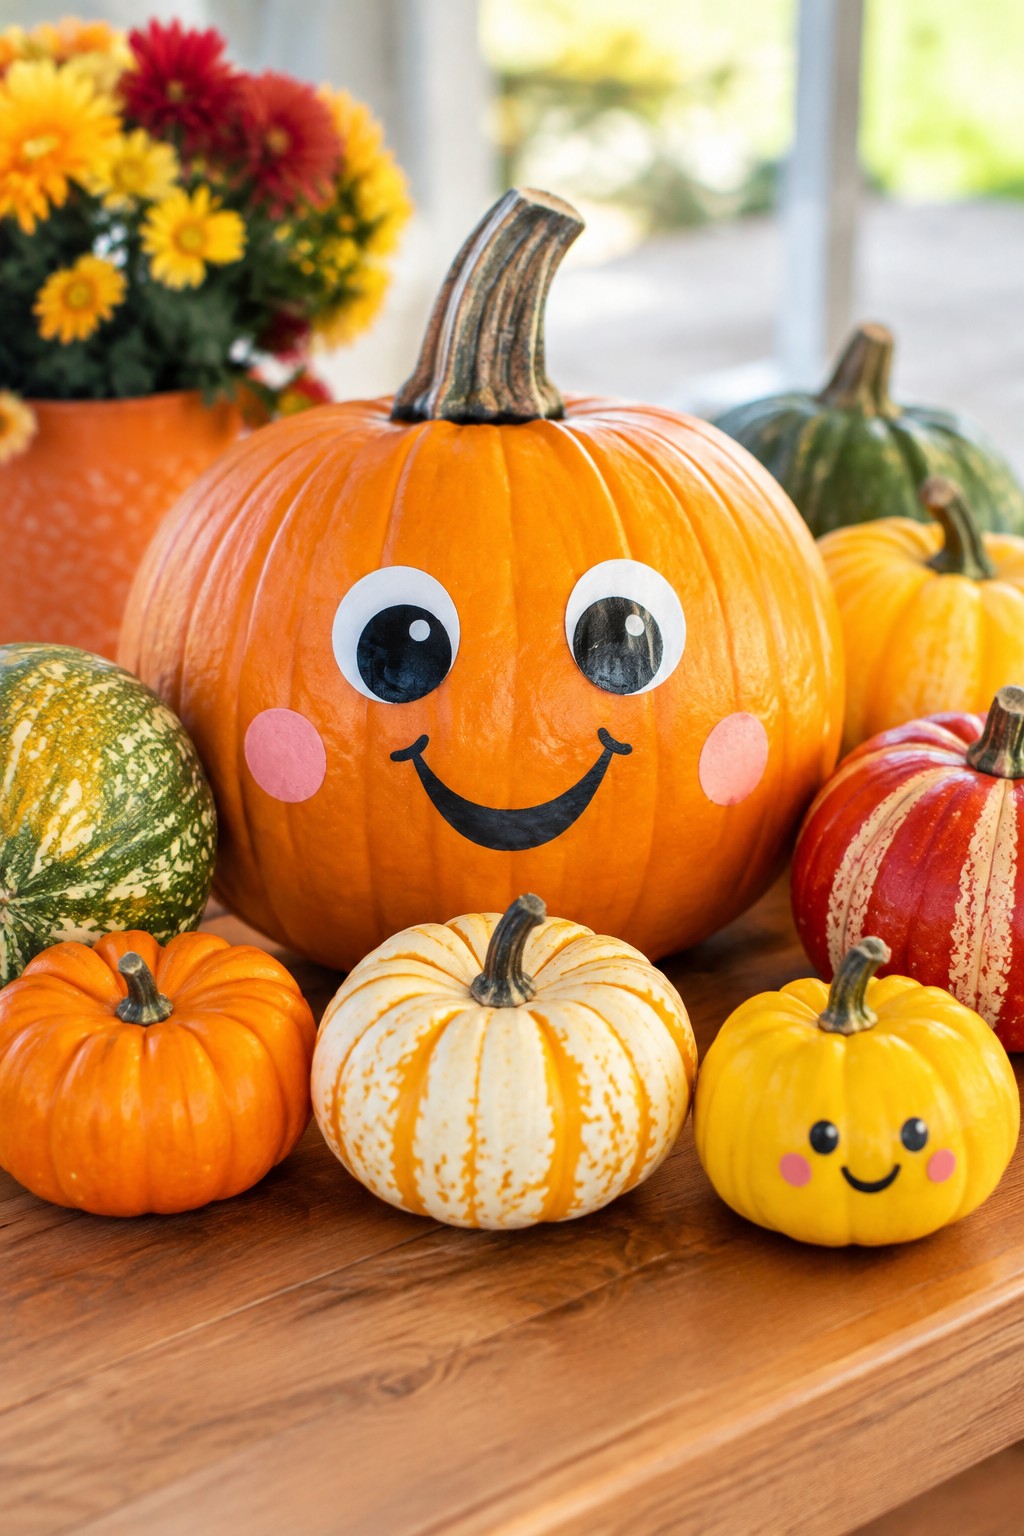
Turning plain pumpkins into characters is one of the easiest ways to involve kids. A large orange pumpkin gets big googly eyes, a hand-drawn smile, and pink cheeks, while a smaller yellow one nearby shows the same playful style on a smaller scale. No carving tools are needed, just basic craft supplies.
Place the finished pumpkins on a table or porch step where the faces show clearly. Let each child pick their own pumpkin and add eyes, a mouth, and simple color accents so the group looks cheerful together.
Make A Pumpkin Scarecrow To Sit On Your Steps
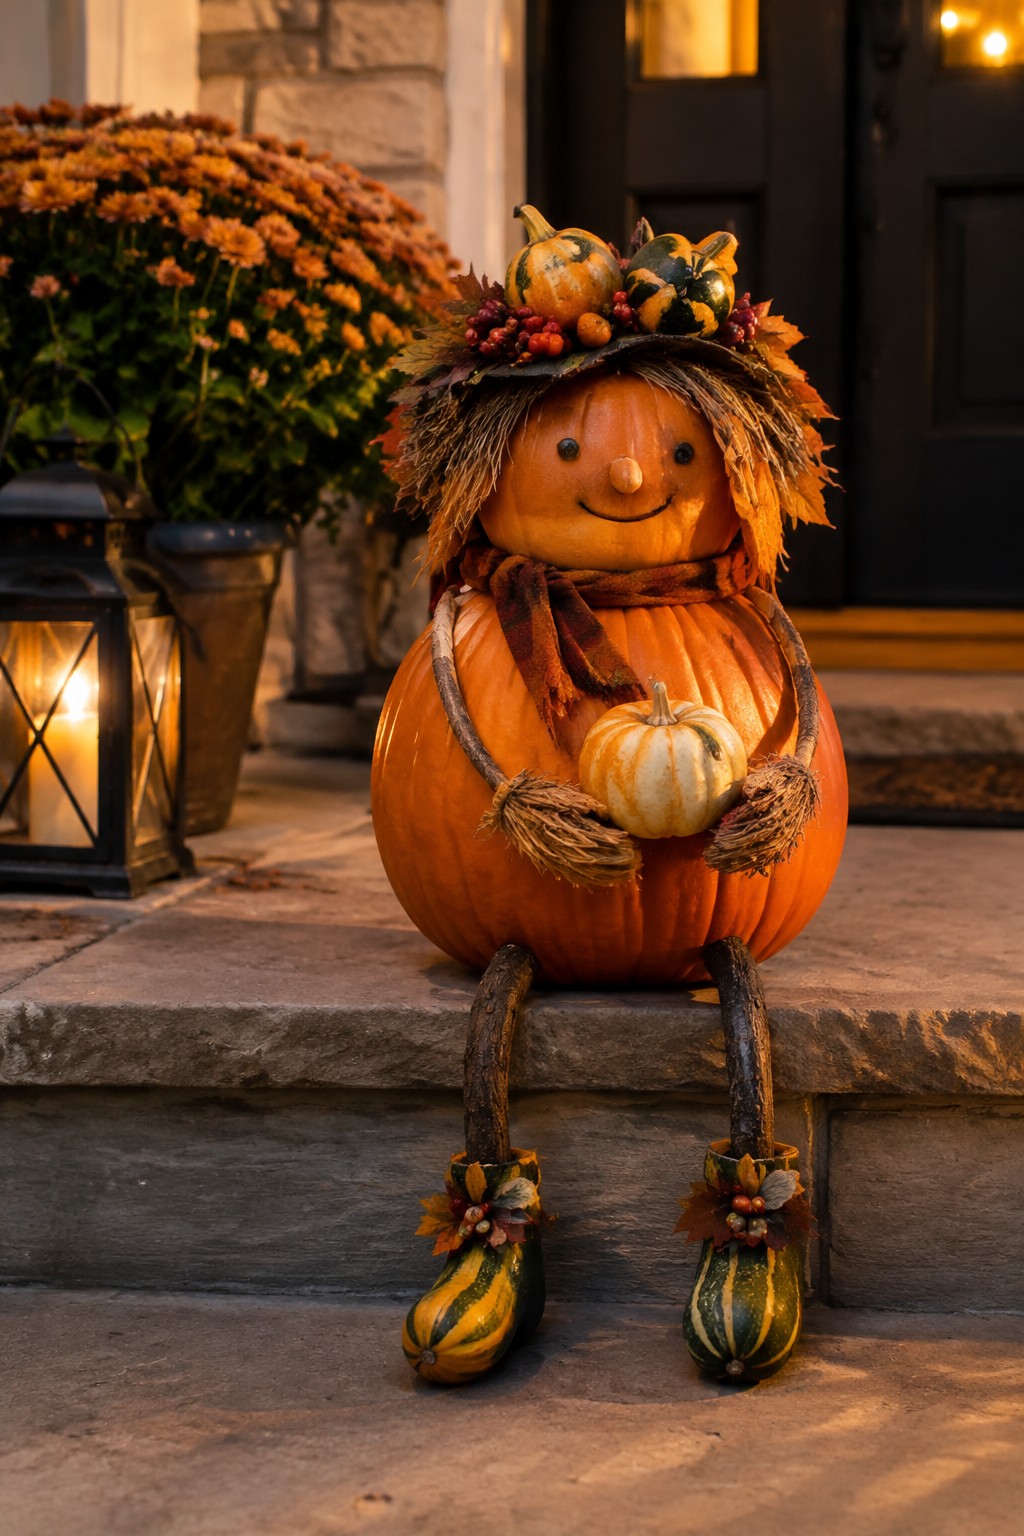
A big round pumpkin works well as the body for a simple seated figure. Kids can help add stick arms and legs, tie on a scarf, and set a smaller pumpkin in its hands so it looks like it is holding something. The leafy hat and gourd boots give it extra character without needing much extra work.
This style looks good on porch steps or a low wall near the front door. Use one large pumpkin for the main shape, a few sticks or dowels for the limbs, and any small gourds you have on hand. It stays friendly and playful while still reading as Halloween.
Fill A Bowl With Mixed Pumpkins
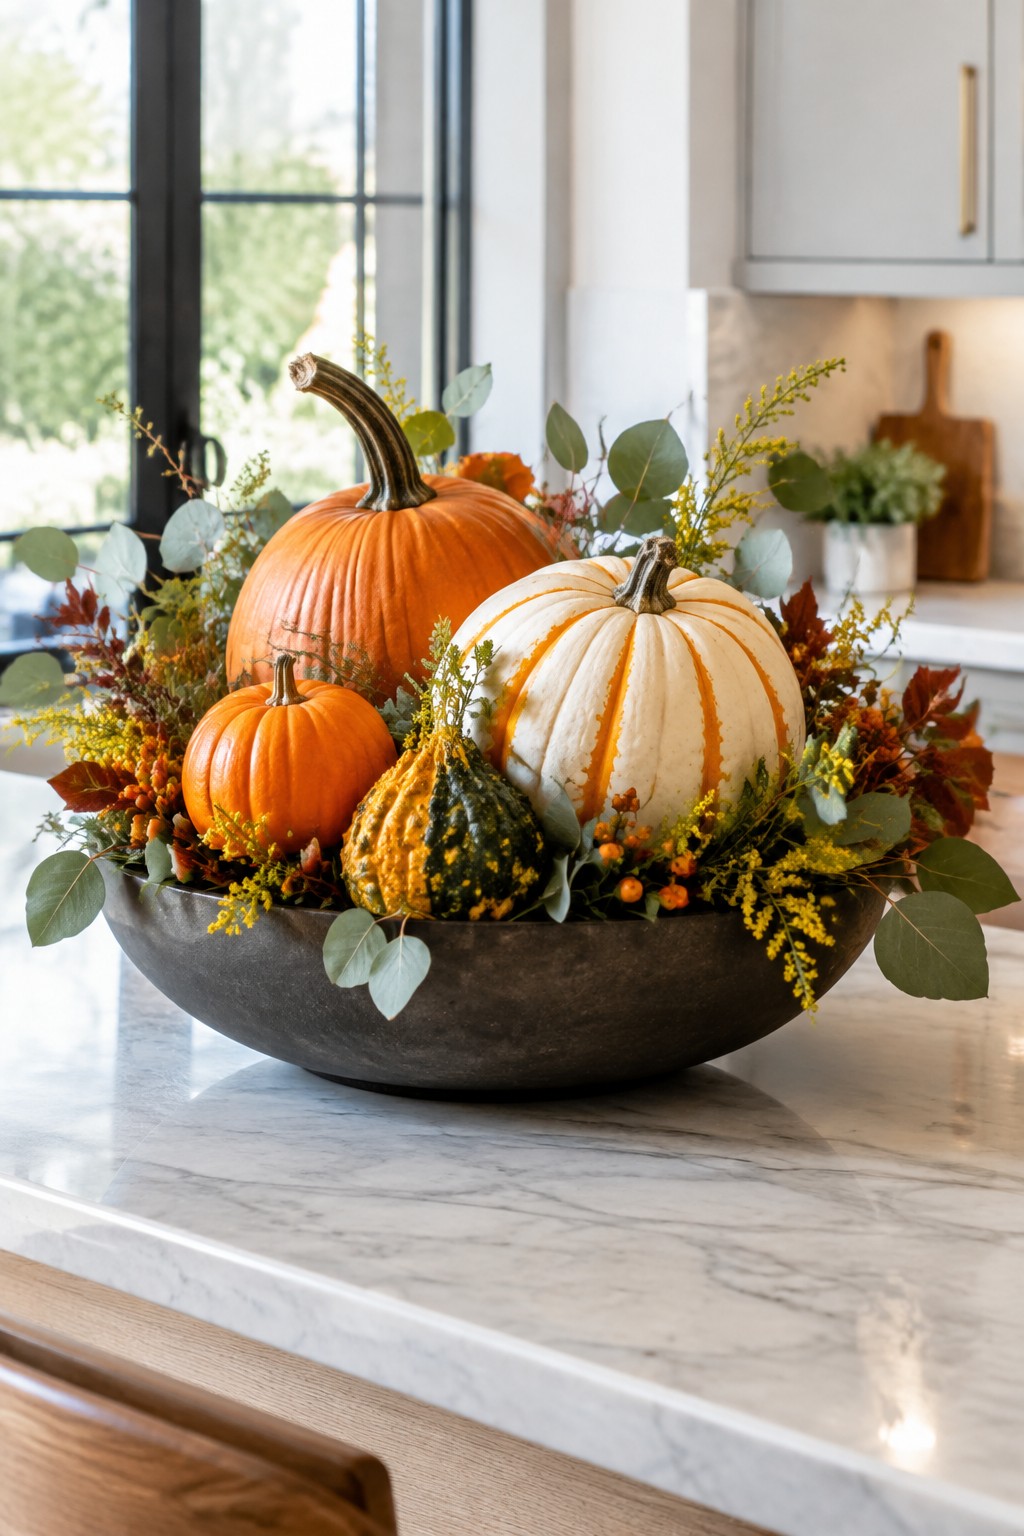
A bowl filled with several pumpkins makes an easy centerpiece that feels festive without much effort. Kids can pick out different sizes and colors, then add simple details like stripes or dots with paint to make each one stand out.
Place the bowl on a kitchen counter or table where it gets noticed right away. Use real or craft pumpkins, tuck in a few leaves or small stems, and let the kids arrange everything themselves so the finished look feels like their own.
Arrange Pumpkins Along The Mantel
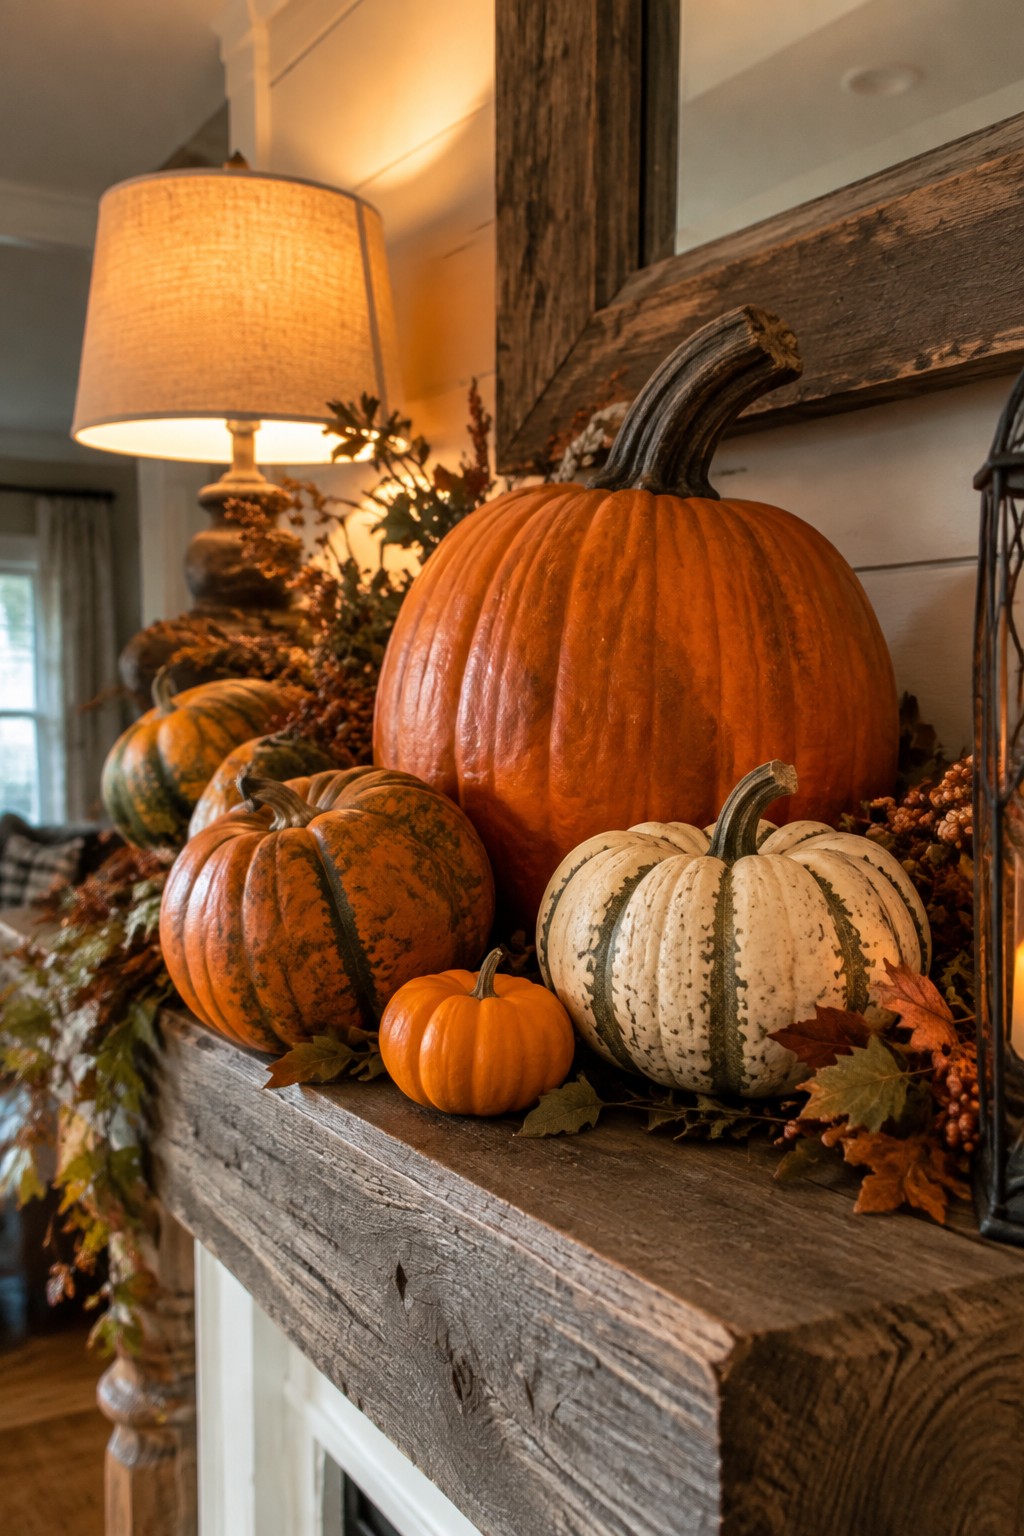
One simple idea for kids is to line up pumpkins of different sizes right across the mantel. The large orange one in the middle stands out next to the smaller striped ones and the tiny pumpkin tucked in front.
Kids can paint or draw on their own pumpkins first, then help set them in place. Use just a few leaves or branches underneath so the pumpkins stay the main focus without crowding the space.
Paint Pumpkins With Buttons And Googly Eyes
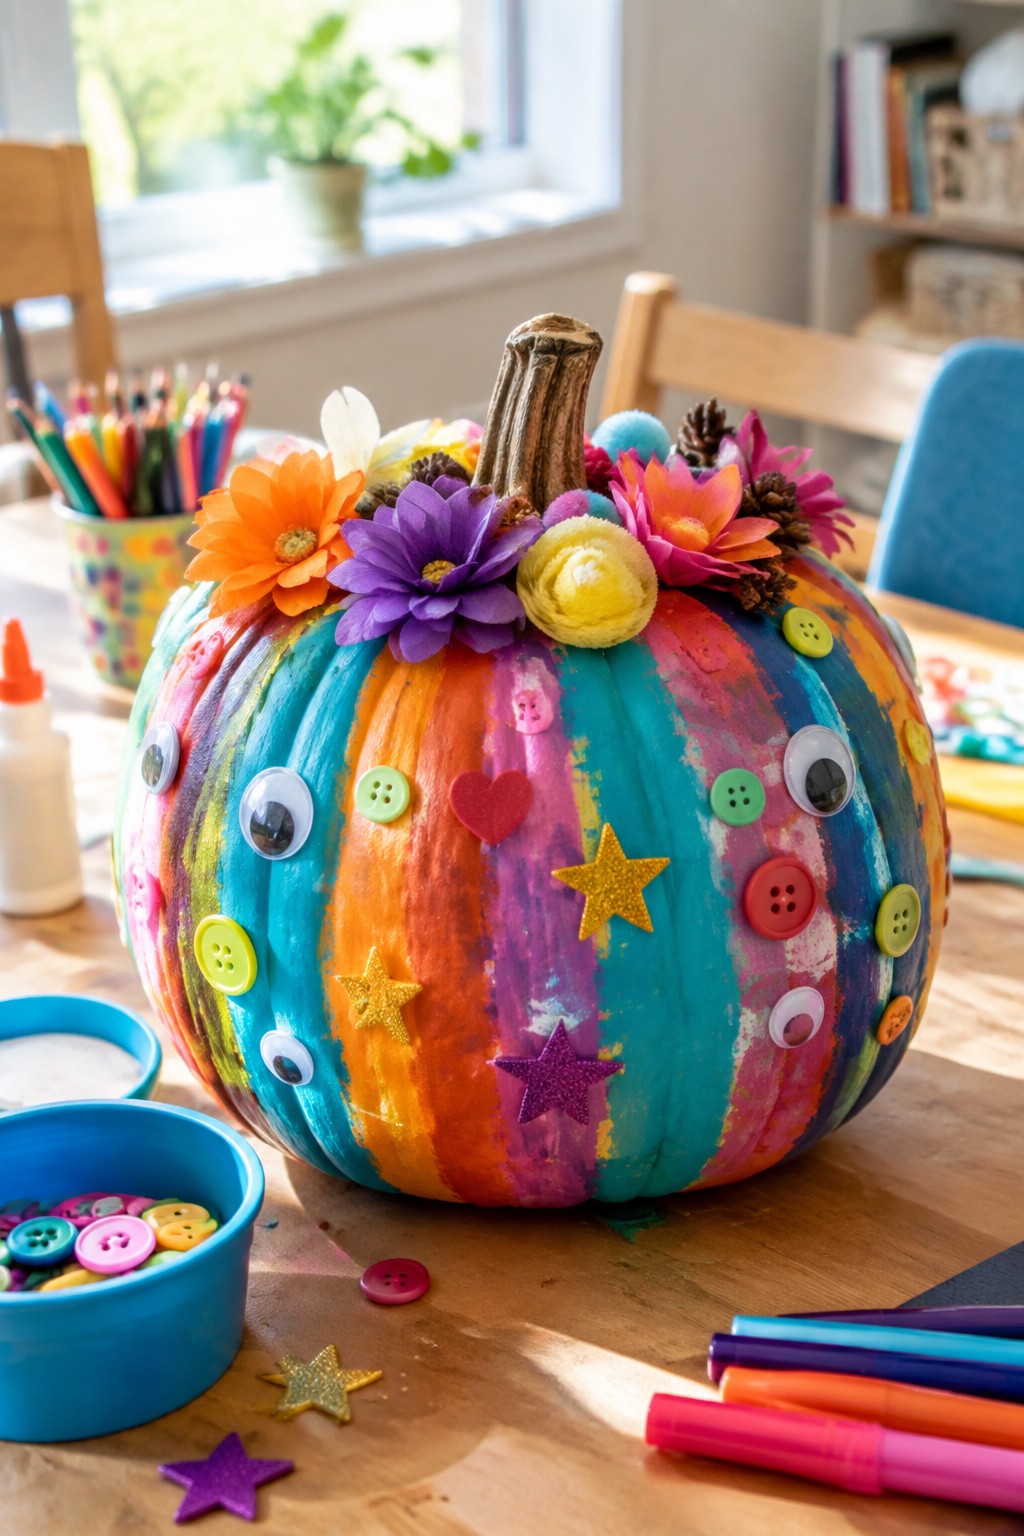
Kids love turning plain pumpkins into something bright and playful. A few stripes of paint, some large buttons, and plenty of googly eyes give the pumpkin instant personality without needing any carving skills. The mix of colors and textures makes it stand out on a table while still feeling like something a child actually made.
Set up a simple station with acrylic paints, a glue gun or craft glue, and a bin of buttons and eyes. Let the kids paint first, then add the decorations once the paint dries. This project works well indoors on a protected table and gives you a cheerful centerpiece that can stay up through the whole month.
Make Pumpkin Characters With Googly Eyes And Hats
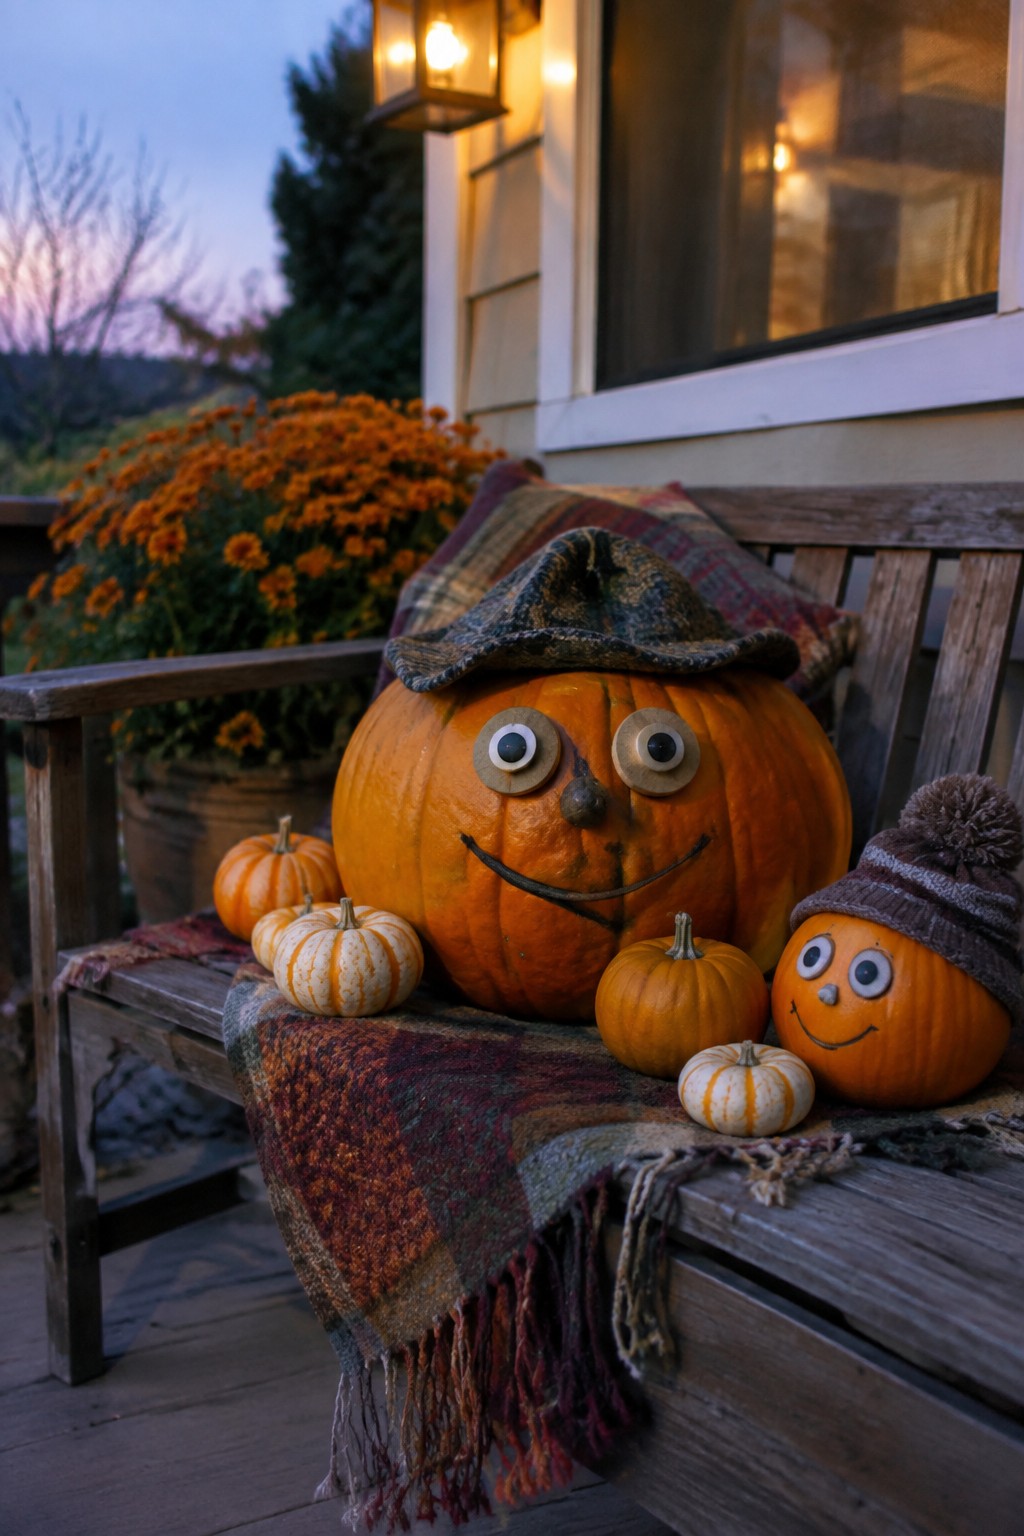
Kids can turn ordinary pumpkins into friendly characters using just a few craft supplies. Googly eyes, a marker for a smile, and simple hats give each pumpkin its own personality without any carving.
Group several of these decorated pumpkins on a porch bench or steps so the larger one anchors the scene and the smaller ones sit around it. The setup stays light and fun while showing off the kids’ work in an outdoor spot where it gets noticed.
Display A Plain Pumpkin On A Side Table
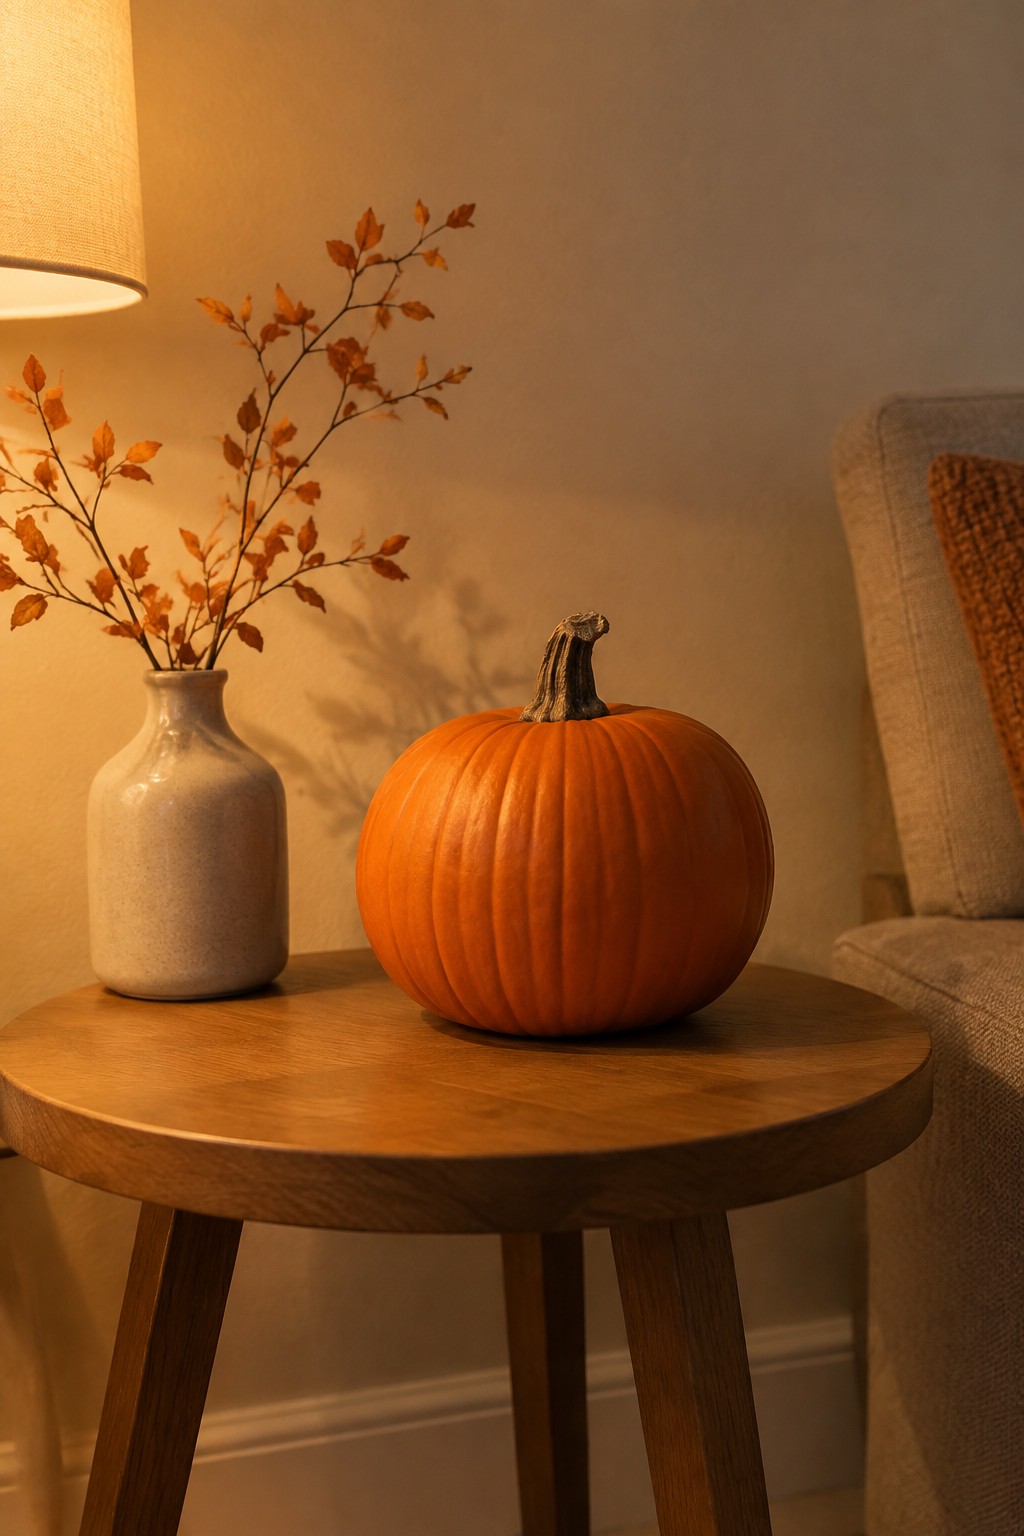
A single uncarved pumpkin makes an easy starting point for kids who want to try pumpkin decorating without any carving tools. The bright orange color stands out on its own, so the pumpkin becomes the main focus instead of needing extra pieces around it.
Set one pumpkin on a small table in a living room or hallway corner. Kids can add paint or markers later if they want to change the look, but the simple version already gives a clear seasonal touch without filling the space.
Arrange Pumpkins On A Tray
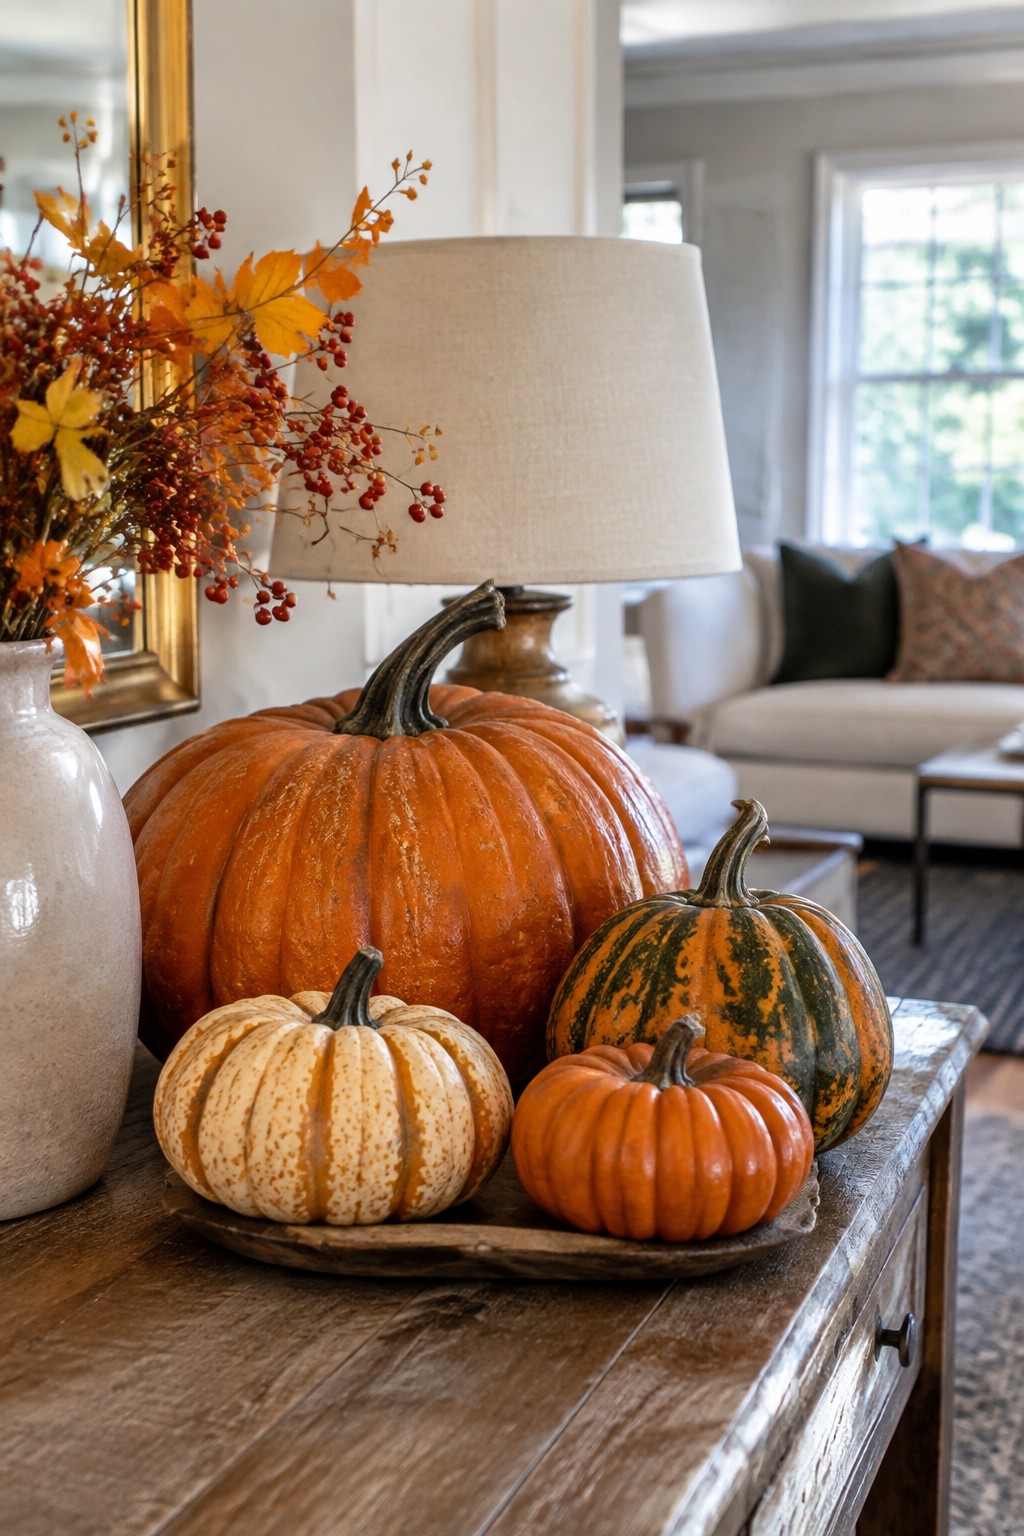
Grouping pumpkins together on a tray makes a simple and kid-friendly display. Different sizes and colors stand out more when they sit side by side, and children can easily add their own painted or drawn details to the smaller ones.
Place the tray on a console or side table where it gets noticed without crowding the room. A few supporting pieces like a vase nearby are enough. The rest of the space can stay plain so the pumpkins remain the focus.
Paint Bright Faces On Pumpkins
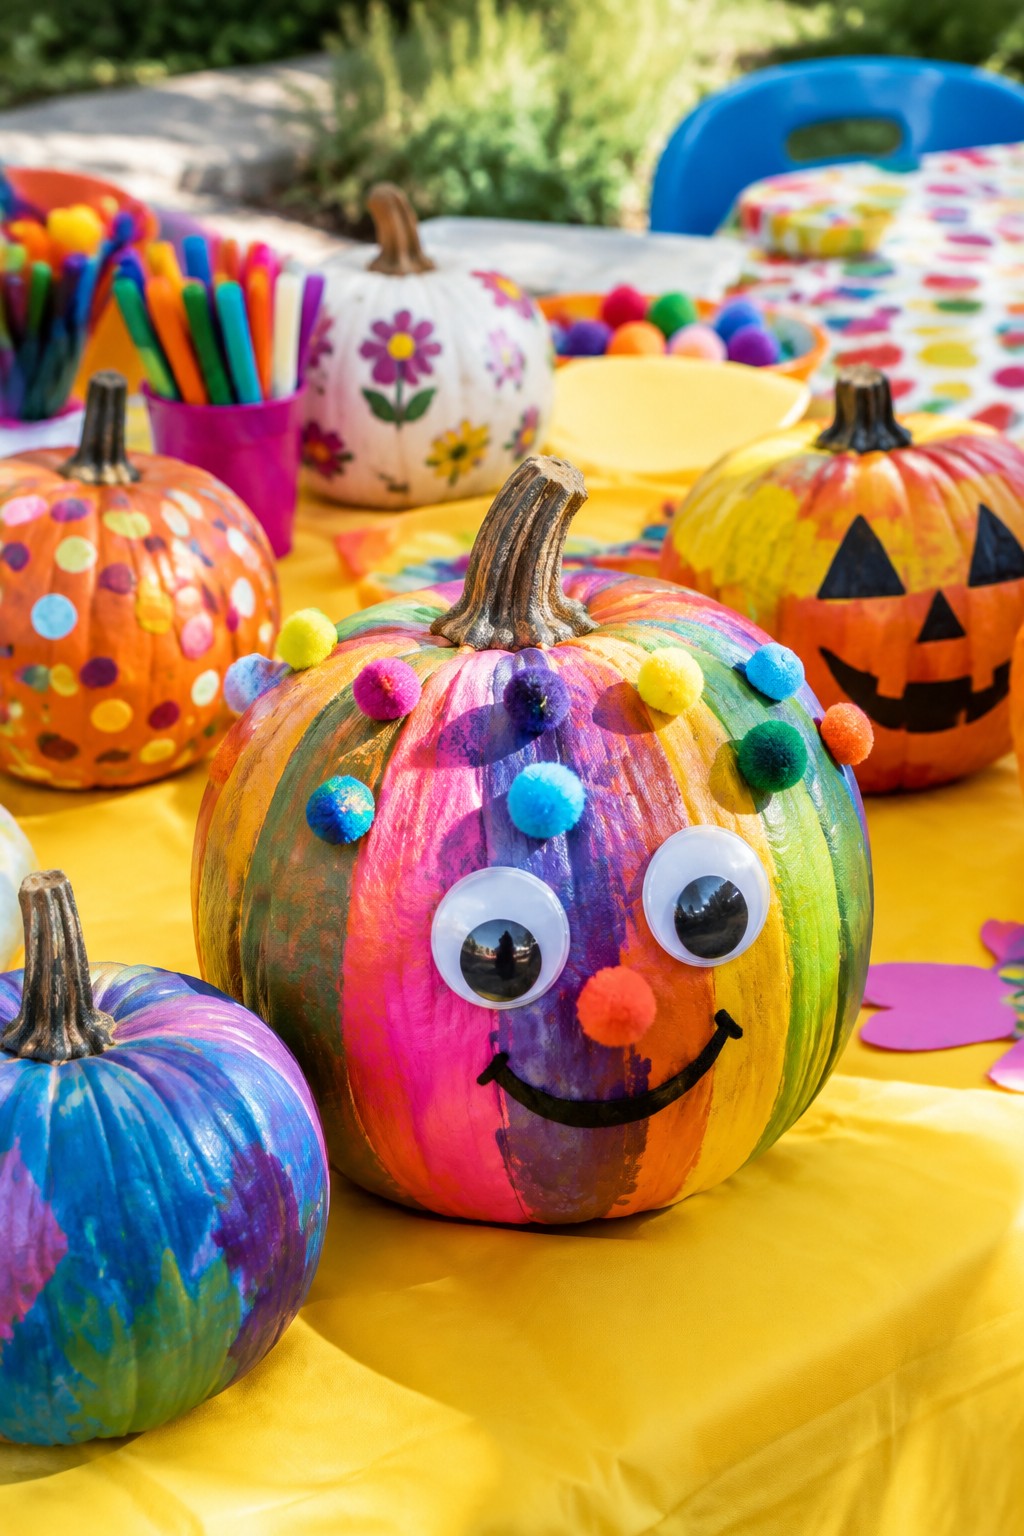
Kids enjoy turning plain pumpkins into funny characters with paint and simple add-ons. Bright stripes, big googly eyes, and a mix of pom-poms give each pumpkin a playful look that stands out on a table.
Set up a few pumpkins, some washable paints, and a handful of craft supplies so children can work at their own pace. The finished pumpkins make cheerful table decor for a party or just a weekend craft session.
Stack Pumpkins In A Wicker Basket
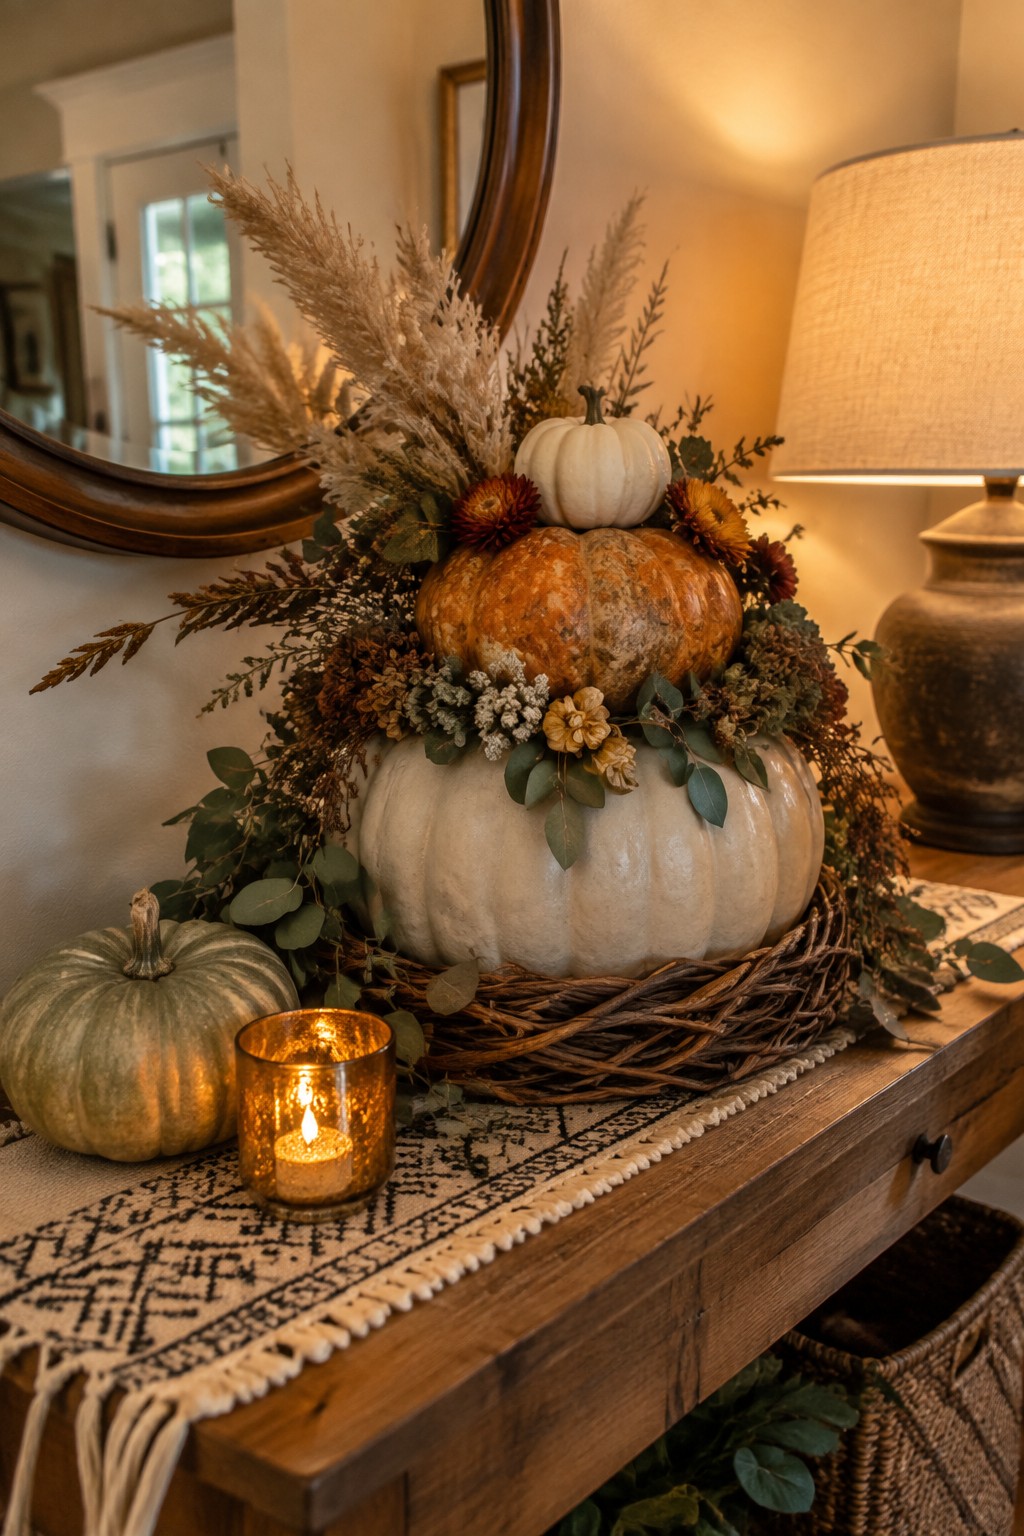
Stacking pumpkins of different sizes creates a simple centerpiece that feels put together without much effort. Kids can help pick the pumpkins and decide the order, which makes the project quick and hands-on.
Place the largest pumpkin at the bottom inside a shallow basket, set a medium one on top, and finish with a small pumpkin. Tuck in a few stems of dried flowers or greenery around the edges to fill any gaps. This works well on a console or dining table where the stack stays visible from the side.
Carve A Jack O Lantern That Spills Its Seeds
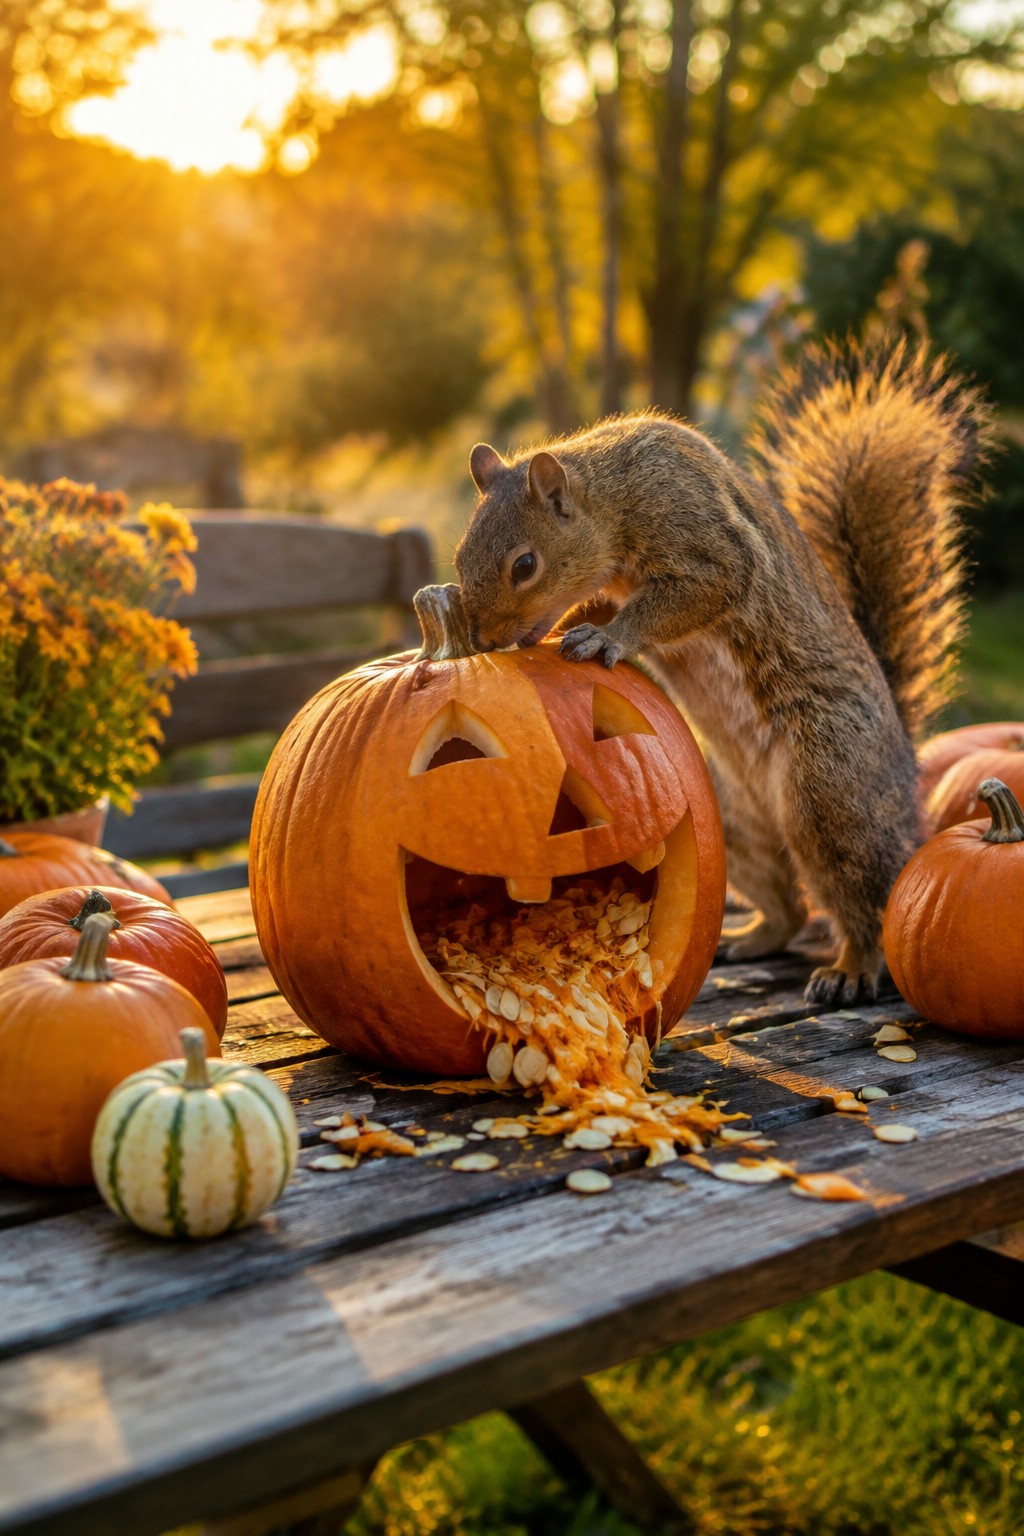
A carved pumpkin with a big open mouth makes a fun focal point when you set it on an outdoor table. The seeds tumbling out give it a playful, slightly messy look that feels perfect for kids who helped with the carving. This turns a simple pumpkin into something more active than just another decoration sitting still.
Place the carved pumpkin in the middle of a picnic table or patio surface and add a few whole pumpkins around it for support. Let some seeds spill naturally across the wood so the display looks like it happened on its own. This idea works well outside because the mess stays contained and the carving can be as simple or detailed as the kids want.
Carve A Pumpkin Fairy House
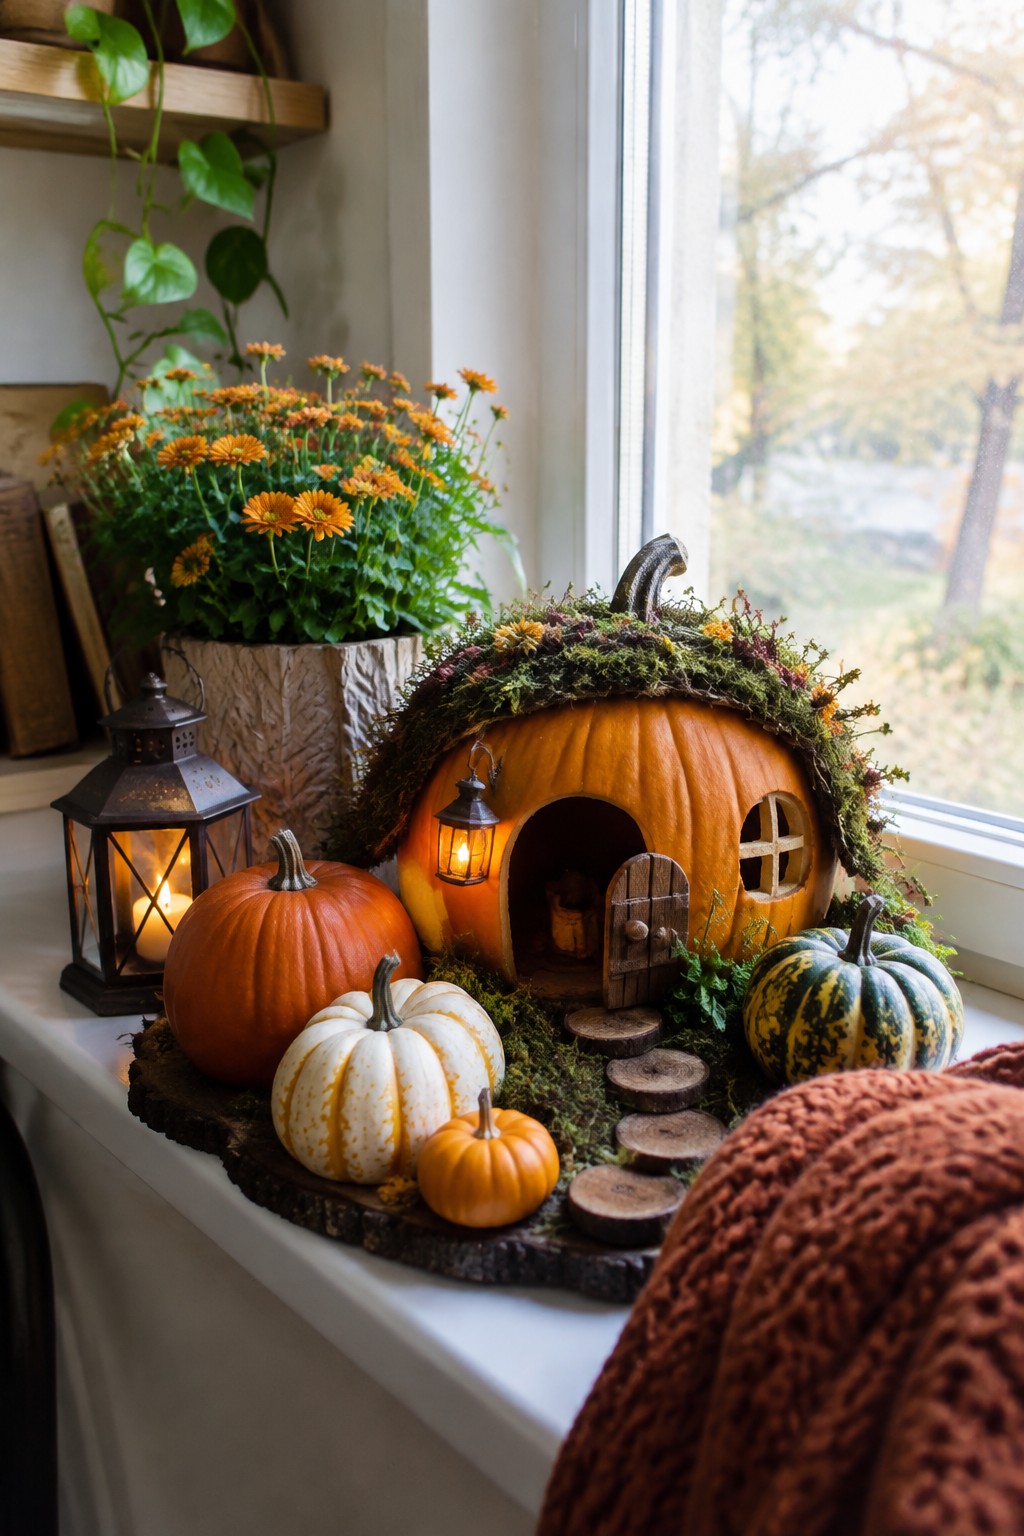
Turning a large pumpkin into a tiny house makes a fun project for kids because the shape already suggests a round little home. Cut a door and a small window, add a mossy roof with twigs or dried flowers, and tuck a battery light inside so it glows at night.
Place the finished house on a tray or windowsill with a few smaller pumpkins around it to complete the scene. Keep the rest of the display simple so the carved house stays the main focus.
Create A Rainbow Painted Pumpkin
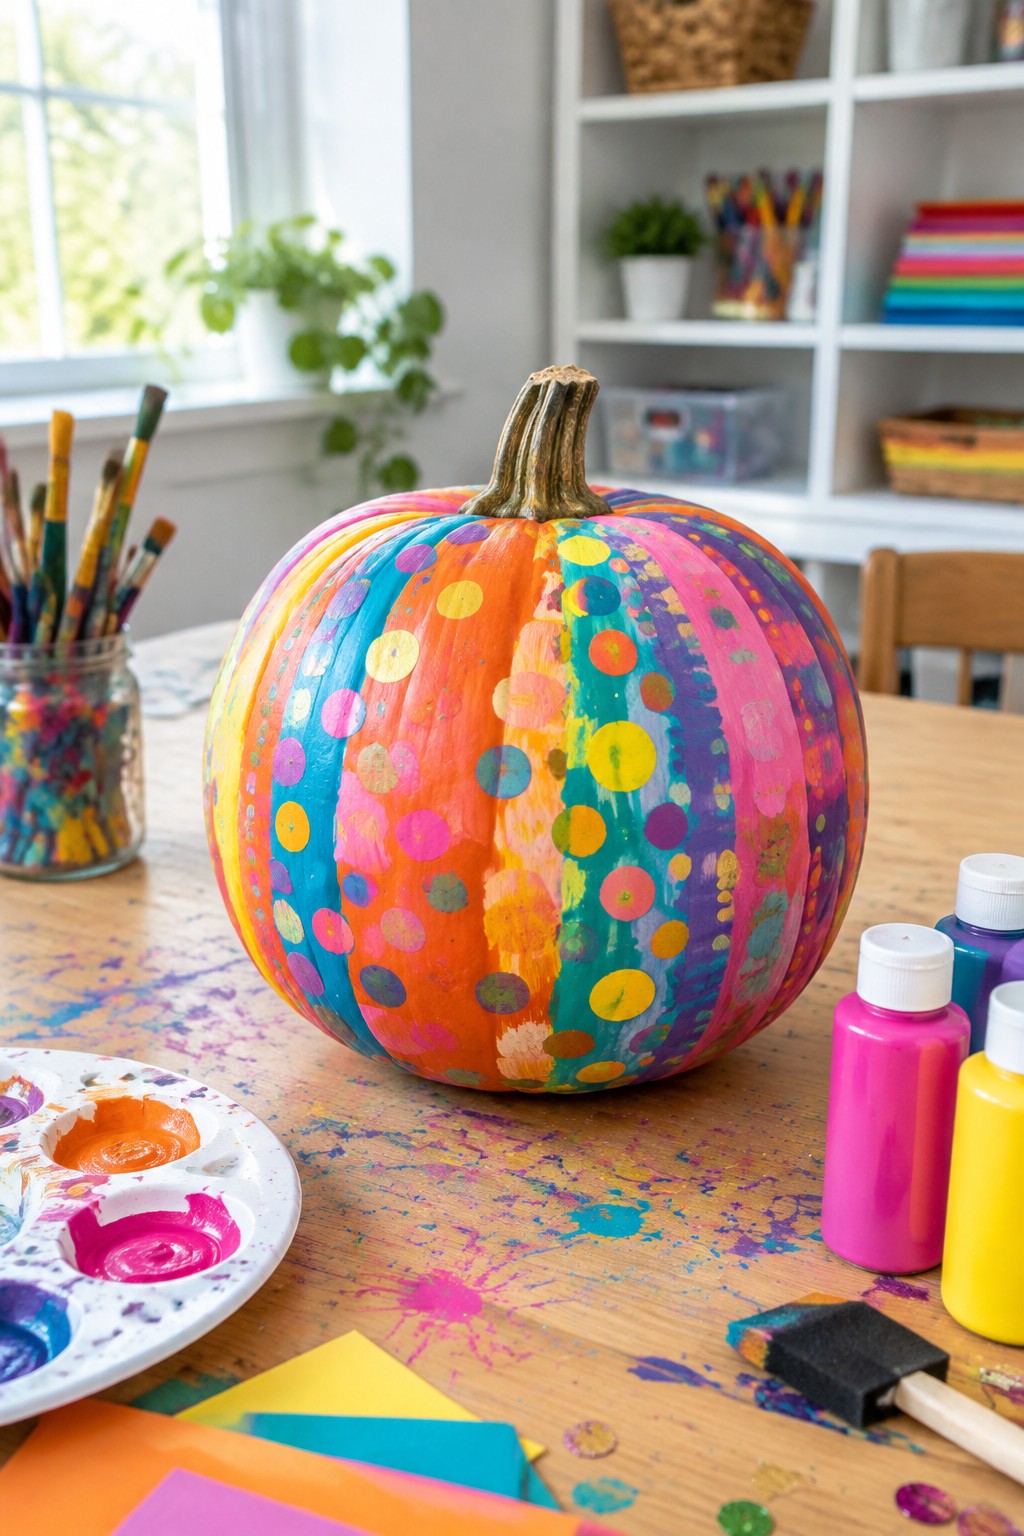
Kids can turn an ordinary pumpkin into a bright focal point by covering it with bold stripes and scattered dots in every color. The pattern stands out immediately and feels playful rather than spooky, which makes it perfect for younger children who want to paint without any scary details.
Set out washable acrylic paints, a few brushes, and one pumpkin per child. Let them choose their own stripe order and dot sizes so each pumpkin ends up unique. The finished piece looks great on a kitchen table or mantel and can be displayed indoors all season.
Fill A Hollowed Pumpkin With Smaller Ones
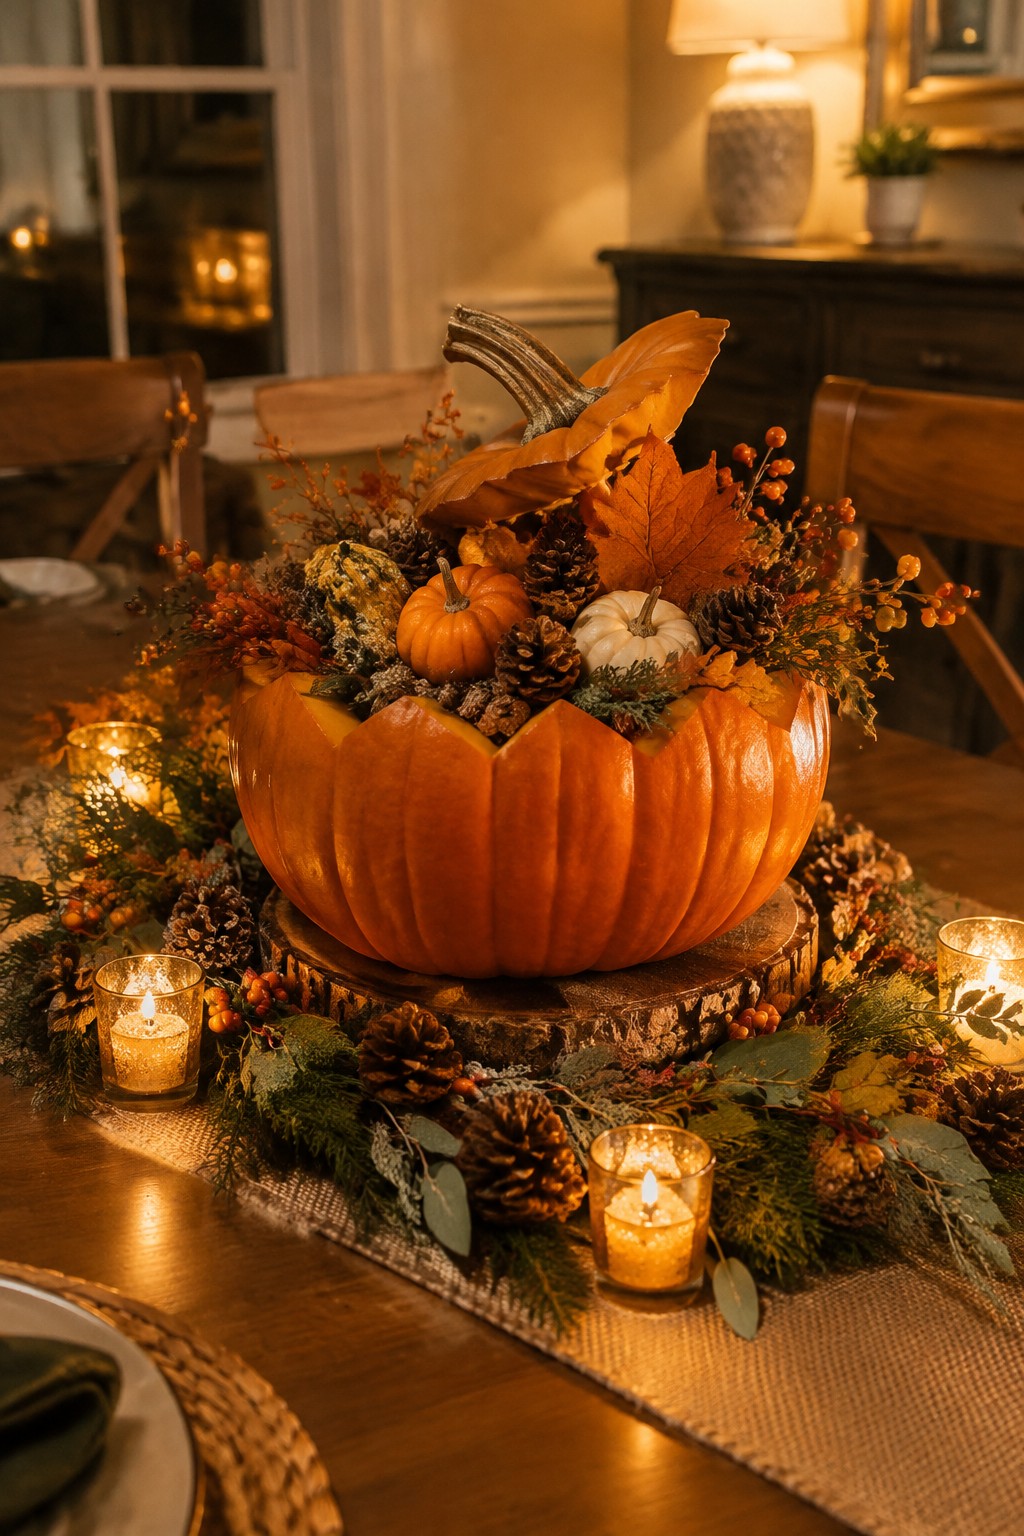
A large pumpkin makes a strong base for a kids table centerpiece when you simply cut off the top and scoop it out. Place smaller pumpkins, gourds, and a few pinecones inside so the arrangement stays low and easy for little hands to help build.
This works best on a dining table where the pumpkin sits on a wood slice or tray. Kids can choose the smaller pumpkins and tuck in the extra bits while an adult handles the big carving. Add a few candles around the base if you want soft light at dinner.
Make A Spider Pumpkin With Googly Eyes
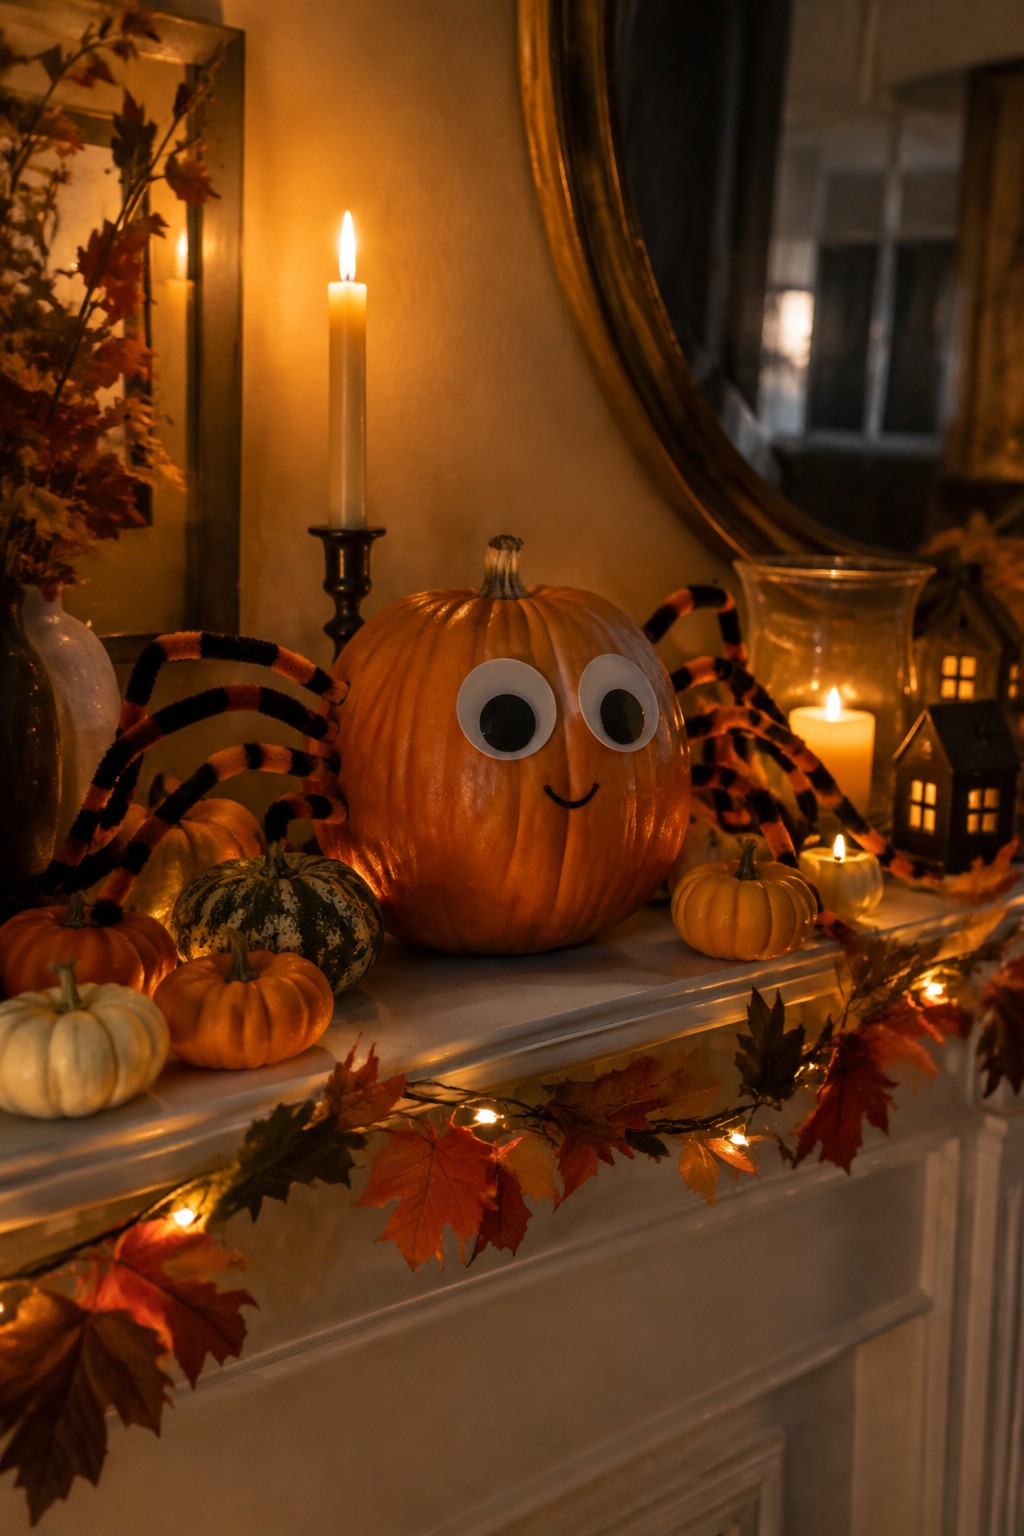
This spider pumpkin stands out as a simple and kid-friendly project. The large googly eyes and striped pipe cleaner legs turn a basic pumpkin into something playful that feels made for little hands.
Set it on a mantel or table as the main piece and surround it with a few smaller pumpkins. The craft supplies are cheap, the steps are easy, and it adds a clear Halloween touch without much cleanup.
Frequently Asked Questions
Q: How do I keep paint from getting everywhere during the session? A: Lay down newspaper or an old sheet on the table first. Keep a bowl of water and some rags close by so kids can rinse brushes quickly. This setup lets them focus on creating without constant cleanup interruptions.
Q: What works best if the kids want to skip carving altogether? A: Painting or gluing on items gives the same fun without sharp tools. Try foam shapes or washi tape for designs that hold up well. Kids stay engaged longer when the process feels simple from the start.
Q: How long do these decorated pumpkins usually last outside? A: Most painted versions hold up for about a week before they start to soften. Bring them indoors at night if the weather turns cool. Check daily and add a fresh coat of sealant if the colors begin to fade.
Q: Can I reuse the same pumpkins for different ideas later? A: Wipe off paint with a damp sponge once the session ends. Store them in a cool spot until the next round of decorating. This approach saves money and keeps the activity going without new purchases.
